My Kitchen Always Smells Like Peanut Butter Now
I remember opening a new jar of peanut butter. The rich, nutty smell filled my kitchen instantly. It promised something both tasty and good for me. I wanted a snack that matched that simple, honest feeling. Ever needed a quick bite that actually keeps you going? These bars are my answer. They sit in my fridge, ready for any hunger emergency. My grandkids grab them after school every single day. That smell of peanuts and honey means home to me now.
The Day I Forgot the Honey
My first batch was a funny mess. I was so excited to mix everything together. But I completely forgot the honey. The mixture just crumbled in my hands. It wouldn’t stick together at all. I had to scrape it all back into the bowl. A little warm honey fixed everything perfectly. This taught me a sweet little lesson. Sometimes, what holds things together is the simplest, stickiest ingredient. Cooking reminds us to pay attention to the small stuff. It makes all the difference in life and in snacks.
Why This Simple Combo Works So Well
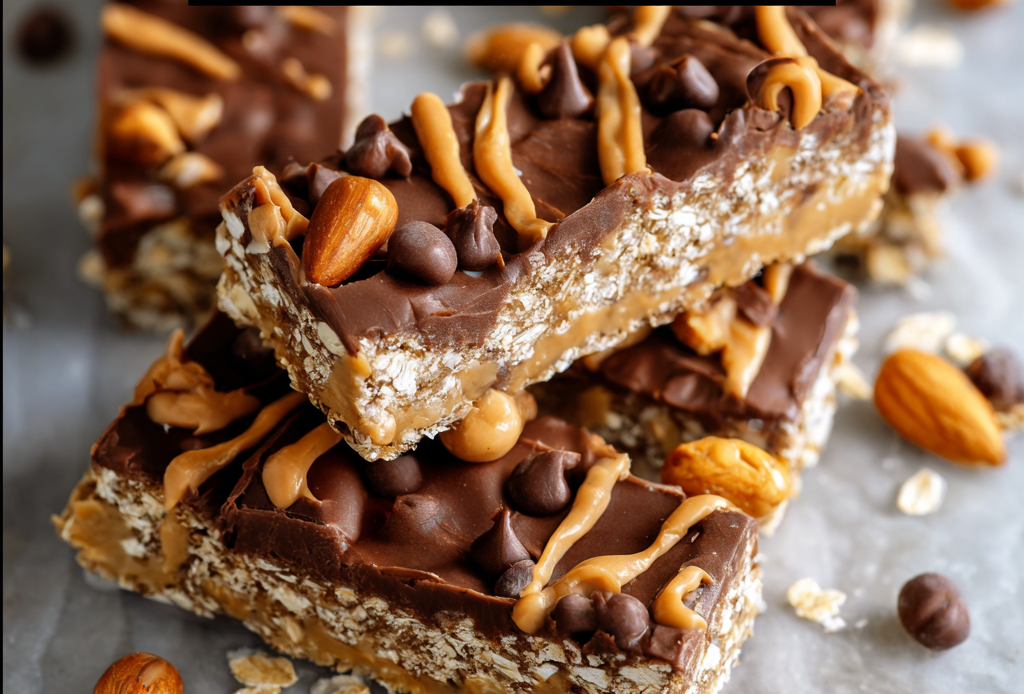
Let’s talk about what makes these bars special. First, the creamy peanut butter and sweet honey are a perfect pair. They create a sticky, rich base that holds everything. Second, the oats add a wonderful, hearty chew. They give the bar its satisfying texture and keep you full. You can add chocolate chips or dried fruit too. Which flavor combo surprises you most: peanut butter and chocolate or peanut butter and raisins? Tell me in the comments below. I love reading your clever ideas.
A Snack Born From Need
This style of bar doesn’t have one single origin. It comes from a common need for quick, lasting energy. Hikers and athletes have made similar mixes for decades. They combined oats, nuts, and sweeteners for fuel on the go. Our home kitchen version is just a simpler, tastier take on that idea. *Did you know rolled oats are called “old-fashioned” for a reason?* People have been eating them for centuries. They are a timeless, wholesome food. Now they live in our fridge as a modern, no-bake treat. What’s your favorite on-the-go snack?

Ingredients:
| Ingredient | Amount | Notes |
|---|---|---|
| Rolled oats | 2 cups | Old-fashioned or quick oats |
| Vanilla protein powder | 1 cup | |
| Peanut butter | 1 cup | Natural, creamy |
| Honey | 1/2 cup | Or maple syrup |
| Vanilla extract | 1 tsp | |
| Salt | 1/4 tsp | |
| Mini chocolate chips | 1/2 cup | Optional |
How to Make Your No-Bake Protein Bars
Let’s make a quick and healthy snack. These bars come together in your mixing bowl. You will not need to turn on your oven. They are perfect for busy days.
Step 1 Line an 8-inch pan with parchment paper. This makes lifting out the bars so easy. Mix your dry ingredients in a large bowl. Use oats, protein powder, and salt. Step 2 Warm the peanut butter and honey in a pot. Use low heat until it stirs smooth. Remove from heat and stir in vanilla. (My hard-learned tip: slightly warm peanut butter mixes better). Step 3 Pour the wet mix into the dry ingredients. Stir until everything is fully combined. Fold in chocolate chips now if you like. The dough will be very thick. Step 4 Press the mix firmly into your prepared pan. Use a spatula or your clean hands. Press it down evenly into all corners. This prevents crumbly bars later. Step 5 Chill the pan in the fridge for two hours. This sets the bars so they hold shape. Then lift out and cut into squares. Store them in a sealed container. What’s the best way to store these bars for freshness? Share below! Cook Time: 2 hours (chilling) Total Time: 2 hours 15 minutes Yield: 12 bars Category: Snack, No-BakeThree Fun Twists on the Classic Bar
Once you master the basic recipe, try a new version. A simple swap can create a whole new snack. It keeps your snack routine exciting and tasty. Here are three ideas to get you started.
Tropical Twist Swap peanut butter for almond butter. Add chopped dried mango and coconut flakes. It tastes like a sunny vacation. Chocolate Espresso Boost Use chocolate protein powder. Mix in a tablespoon of instant espresso. It is a perfect afternoon pick-me-up. Berry Crunch Use vanilla protein powder. Stir in freeze-dried raspberries. Add chopped almonds for a nice crunch. Which creative spin would you try first? Vote in the comments!Serving Your Homemade Protein Bars
These bars are great all on their own. But you can make them part of a bigger treat. Think about pairing them with a drink or a side. It turns a simple snack into a small meal.
For a mini breakfast, crumble one over Greek yogurt. Or pack one with fresh apple slices. They are perfect for a lunchbox. *Fun fact: oats contain fiber that helps you feel full.* Pair your bar with a cold glass of milk. I love almond milk with mine. For a grown-up treat, try it with iced coffee. A splash of cream in the coffee is lovely. Which would you choose tonight: the yogurt bowl or the coffee pair?
Keep Your Protein Bars Fresh and Tasty
Store bars in a sealed container. Keep them in the fridge for up to two weeks. For longer storage, freeze them for three months. I wrap mine individually for quick grabs. This makes busy mornings so much easier.
You can eat them straight from the fridge. They are firm and satisfying this way. Let a frozen bar thaw for ten minutes. No reheating is needed at all. Do you prefer yours cold or room temperature?
This recipe is perfect for batch cooking. Double it and use a bigger pan. You will have snacks ready for weeks. *Fun fact: homemade bars save money and packaging.* Share your batch-cooking tips with us below.
Fix Common No-Bake Bar Problems
Are your bars too crumbly? You may not have pressed the mix firmly enough. Press it down very hard into the pan. Also, make sure your peanut butter is runny. Warming it helps everything stick together.
Bars that are too sticky need more dry ingredients. Add another handful of oats or protein powder. Mix it in until the dough is thick. Always chill the bars the full two hours. This step matters for the perfect texture.
If the bars taste dry, check your protein powder. Some brands absorb more moisture than others. Next time, add a touch more honey or peanut butter. Have you ever had a batch turn out too dry?
Your Protein Bar Questions Answered
Can I make these gluten-free? Yes, use certified gluten-free oats. Check your protein powder label too. Then you are all set for a safe snack.
How far ahead can I make them? They are a great make-ahead recipe. Make them on a Sunday for the whole week. They stay fresh and tasty.
What can I swap for peanut butter? Any nut or seed butter works well. Try almond butter or sunflower seed butter. The flavor will change in a nice way.
Can I skip the protein powder? You can, but the bars will be softer. Add extra oats to help them hold shape. They will still be delicious.
Can I double this recipe? Absolutely! Use a 9×13 inch pan for a double batch. Press the mixture in just as firmly. You will have plenty to share.
Wrapping Up Your Kitchen Adventure
I hope you love these easy, no-bake bars. They are a little piece of homemade goodness. Making your own snacks is so rewarding. I would love to see your creations.
Share a photo and tag Savory Discovery on Pinterest. Tell me which variation was your favorite.


No-Bake Protein Bars with Oats and Peanut Butter
Description
Easy, no-bake protein bars packed with oats, peanut butter, and honey. A perfect healthy snack.
Ingredients
Instructions
- Line an 8-inch pan with parchment paper. In a large bowl, mix the dry ingredients: rolled oats, protein powder, and salt.
- In a small pot over low heat, warm the peanut butter and honey, stirring until smooth. Remove from heat and stir in the vanilla extract.
- Pour the warm wet mixture into the dry ingredients. Stir until fully combined. If using, fold in the chocolate chips. The dough will be very thick.
- Transfer the dough to the prepared pan. Press it down firmly and evenly into all corners using a spatula or clean hands.
- Chill the pan in the refrigerator for 2 hours to set. Once firm, lift out the slab and cut it into squares.
Notes
- Store bars in an airtight container in the refrigerator for up to a week, or freeze for longer storage.


