The First Warm Bite
I still remember my first real pita. It was warm from a street cart. The bread smelled like toasted flour and sunshine. I tore it open and steam poured out. That soft pocket felt like a little miracle. Ever wondered how you could turn simple flour and water into something so magical? I knew I had to learn. Now my kitchen often smells like that memory. It is a smell of comfort and simple joy.
My Pita Puff Surprise
My first try did not go perfectly. The dough was a sticky mess on my fingers. I worried my pitas would be flat rocks. But then, in the hot oven, they puffed up like little balloons. I cheered right there at the oven door. That surprise taught me a beautiful lesson. Home cooking is about trusting the process, not being perfect. The small wins matter most. Have you had a happy kitchen surprise lately? Tell me about it!
Why It Tastes So Good
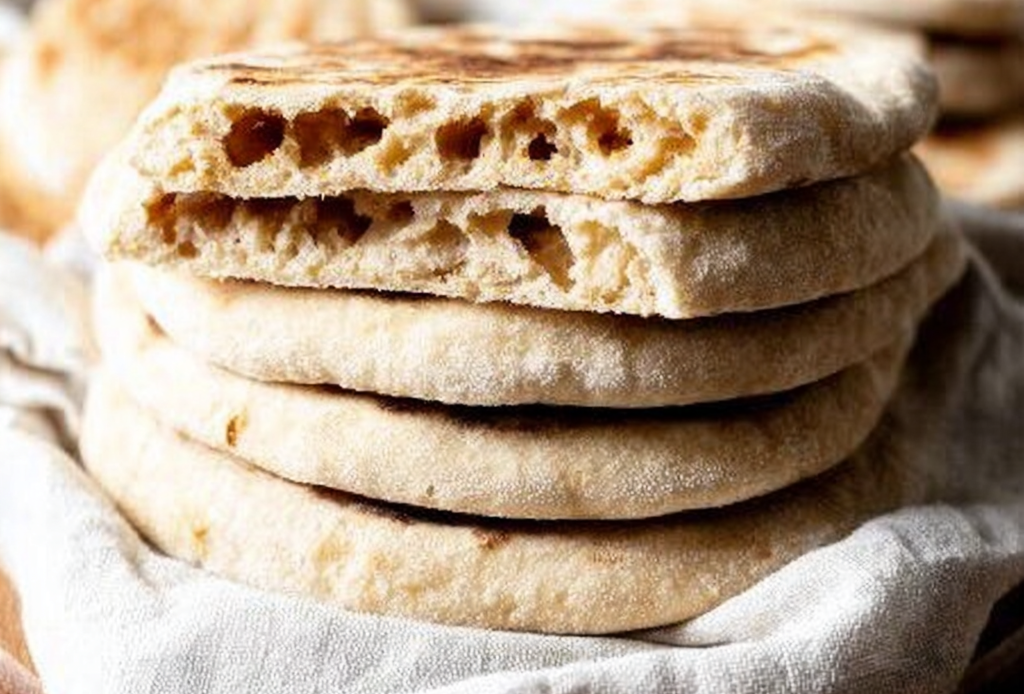
Two things make this bread special. First, that hot oven blast creates the signature pocket. It’s perfect for holding your favorite fillings. Second, the simple ingredients mean you taste the honest, wheaty flavor. It is sturdy yet soft, a wonderful contrast. Which flavor combo surprises you most? I love mine with spicy chickpeas and cool yogurt. What would you stuff inside your perfect pita?
A Bread With a Pocket
This bread has ancient roots from the Middle East. For centuries, it was a practical way to eat. The pocket acts as an edible bowl for meats and veggies. It traveled along trade routes and evolved. *Did you know the word “pita” often means “flat” or “bread” in Greek?* It is a food that connects many cultures. I feel that history every time I bake a batch. Try it and taste a piece of the past yourself.

Ingredients:
| Ingredient | Amount | Notes |
|---|---|---|
| All-purpose flour | 3 cups | Plus more for dusting |
| Instant yeast | 2 teaspoons | |
| Sugar | 1 teaspoon | |
| Salt | 1 teaspoon | |
| Warm water | 1 ¼ cups | About 110°F (43°C) |
| Olive oil | 2 tablespoons |
Make Your Own Pita Pockets
Let’s make soft, pocketed pita bread. It is easier than you think. The magic happens in a hot oven. You will feel so proud watching them puff.
Step 1 Mix the dry ingredients in a big bowl. That is flour, yeast, sugar, and salt. Stir them together with a fork. Then add the warm water and olive oil. Step 2 Stir until a shaggy dough forms. Then use your hands to knead it. Knead for about 5 minutes until smooth. (A hard-learned tip: too much flour makes tough pita!). Step 3 Let the dough rise in a greased bowl. Cover it with a damp kitchen towel. Leave it for 1 hour in a warm spot. It should double in size. Step 4 Punch the dough down to release air. Divide it into 8 equal pieces. Roll each piece into a smooth ball. Let them rest for 15 minutes. Step 5 Roll each ball into a ¼-inch thick circle. Use flour to prevent sticking. Do not roll them too thin. They need some thickness to puff. Step 6 Bake on a preheated baking sheet. Your oven must be very hot, 475°F. Bake for 4-6 minutes until puffed and golden. Watch them balloon through the oven door! What does the yeast need to become active? Share below! Cook Time: 20-30 minutes Total Time: 1 hour 45 minutes Yield: 8 pitas Category: Bread, SideThree Fun Twists on Basic Pita
Your homemade pita is a perfect blank canvas. Try one of these simple flavor spins. It changes your meal with just one extra step.
Garlic Herb Mix minced garlic and dried herbs into the dough. Rosemary or oregano work beautifully. It makes the whole kitchen smell amazing. Whole Wheat Honey Swap one cup of white flour for whole wheat. Add an extra spoon of honey. This gives a nutty, slightly sweet taste. Everything Spice Brush rolled dough with water before baking. Sprinkle on everything bagel seasoning. You get a crunchy, savory top every time. Which twist will you try first? Vote in the comments!How to Serve Your Fresh Pita
Warm pita bread is a meal superstar. Tear it for dipping or slice for stuffing. Here are my favorite ways to enjoy it.
Serve with creamy hummus and crunchy vegetables. Or make classic gyros with spiced meat and tzatziki. A simple salad of tomato and cucumber works too. Pair it with mint iced tea for a refreshing drink. A glass of crisp lager also matches well. The flavors complement the bread perfectly. Which would you choose tonight: a dip platter or stuffed pockets?
Keep Your Pita Perfectly Fresh
Cool pitas completely before storing them. Use a bread bag or airtight container. They stay soft on the counter for two days. For longer storage, freeze them right away. I freeze mine in a single layer first.
Reheat frozen pita in a toaster or warm oven. This brings back their soft, pliable texture. Microwaving can make them chewy. Why does this matter? Fresh texture makes your meal special. A batch-cook note: double the recipe for future meals.
What is your best bread storage tip? Share it with us below!
Pita Problems? Easy Fixes Here
Did your pitas not puff? Your oven may not be hot enough. Always preheat your baking sheet too. Another issue: dense, tough bread. You likely used too much flour when kneading.
Sticky dough is a common trouble. Just add flour one spoon at a time. Why this matters? Small fixes build your baking confidence. My first batch was flat, but I learned. Now you can learn from my mistake.
Have you ever had bread not rise? Tell me what happened.
Your Pita Bread Questions Answered
Can I make this gluten-free? Use a 1-to-1 gluten-free flour blend. The texture will be a bit different. They may not puff as high, but still taste great. How far ahead can I make the dough? You can prepare it the night before. Let it rise slowly in the fridge. Punch it down and use it the next day. What can I use instead of olive oil? Any neutral oil works, like avocado or vegetable. Melted butter also adds a nice, rich flavor. The choice is yours. Can I halve or double this recipe? Yes, you can easily scale it. Just keep all the ingredient proportions the same. Your rising time may change slightly. Is instant yeast the same as active dry? They are very similar. You can use them both in this recipe. *Fun fact: instant yeast doesn’t need to be proofed first.Happy Baking from My Kitchen to Yours
I hope you love making this pita bread. There is nothing like warm, homemade bread. Seeing those pockets puff up is pure joy. Thank you for spending time in the kitchen with me.
I would love to see your results! Share a photo and tag Savory Discovery on Pinterest.


Homemade Pita Bread Instructions
Description
Make soft and fluffy pita bread at home with this simple recipe. Watch them puff up in a hot oven for the perfect pocket.
Ingredients
Instructions
- Mix the dry ingredients in a big bowl. That is flour, yeast, sugar, and salt. Stir them together with a fork. Then add the warm water and olive oil.
- Stir until a shaggy dough forms. Then use your hands to knead it. Knead for about 5 minutes until smooth. (A hard-learned tip: too much flour makes tough pita!).
- Let the dough rise in a greased bowl. Cover it with a damp kitchen towel. Leave it for 1 hour in a warm spot. It should double in size.
- Punch the dough down to release air. Divide it into 8 equal pieces. Roll each piece into a smooth ball. Let them rest for 15 minutes.
- Roll each ball into a ¼-inch thick circle. Use flour to prevent sticking. Do not roll them too thin. They need some thickness to puff.
- Bake on a preheated baking sheet. Your oven must be very hot, 475°F. Bake for 4-6 minutes until puffed and golden.
Notes
- For best results, ensure your oven is fully preheated and use a baking stone or inverted baking sheet for an even hotter surface.


