The First Crispy Bite
I remember my first homemade chip. It was golden and warm. The crunch echoed in my quiet kitchen. That simple taste beat any bag from the store. Ever wanted that crispy magic from your own oven? It feels like a small victory. You control what goes into your food. That matters more than you think. Let’s make some together.
My Kitchen Mishap
My first batch was a mess. I cut the potatoes too thick. They were chewy, not crispy. My family still ate them all with a laugh. That taught me a good lesson. Perfect isn’t the goal. Sharing what you make is. Home cooking connects us. It is about the trying, not just the result. Have you had a funny kitchen fail? Tell me about it.
Why They Taste So Good
Two things make these chips special. First, thin slices get incredibly crisp. Second, a light oil coat lets the potato flavor shine. You can add any seasoning you like. Try smoked paprika or a little garlic powder. Which flavor combo surprises you most? Sweet paprika or something spicy? Your kitchen, your rules. The simple base is your blank canvas.
A Simple History
Fried potato chips date back to the 1800s. They were a restaurant accident in America. Baking them at home is a newer, lighter twist. It fits our modern desire for simpler snacks. *Did you know the original chef was annoyed by a customer?* That customer kept sending back thick fries. So the chef made them paper-thin. What’s your favorite old-fashioned snack to make new again? Share your ideas below.

Ingredients:
| Ingredient | Amount | Notes |
|---|---|---|
| Potatoes | 2 large | Russet or Yukon Gold |
| Olive oil | 2 tablespoons | Or melted butter |
| Salt | To taste | |
| Black pepper | To taste | Freshly ground |
| Paprika or garlic powder | 1/2 teaspoon | Optional, for seasoning |
How to Bake Your Own Potato Chips
Let’s make crispy chips without a fryer. You just need potatoes, oil, and salt. Baking them is easier and healthier. Your kitchen will smell amazing too.
Step 1 Heat your oven to 400 degrees. Wash and dry two large potatoes. Slice them very thin with a knife or mandoline. Uniform slices cook evenly. Step 2 Toss the slices in two tablespoons of oil. Coat them completely. Add salt, pepper, and any extra seasoning. Paprika gives a nice smoky touch. Step 3 Spread slices in one layer on baking sheets. Do not let them crowd each other. (Hard-learned tip: use parchment paper for easy cleanup). Bake for 15-20 minutes. Step 4 Check the chips after 15 minutes. They should be golden and crisp. Let them cool on the sheet for five minutes. They get crunchier as they cool. What’s the key to perfectly crisp baked chips? Share below! Cook Time: 15-20 minutes Total Time: 30-35 minutes Yield: 2-3 servings Category: Snack, SideThree Fun Ways to Flavor Your Chips
Ready to get creative? Try these simple twists on your next batch. Each one adds a special kick. Your snack game will level up instantly.
Ranch Style Mix dried dill, garlic powder, and onion powder. Toss with the oiled slices before baking. It tastes like your favorite chip dip. Spicy BBQ Add smoked paprika, a pinch of cayenne, and brown sugar. This gives sweet heat. Kids and adults love this flavor. Everything Bagel Use sesame seeds, poppy seeds, garlic, and salt. Sprinkle it on after baking. It is savory and totally addictive. Which spin will you try first? Vote for your favorite in the comments!Serving Your Homemade Chips
These chips deserve a great presentation. Serve them in a big bowl. Pair them with fun dips and drinks. It makes a simple snack feel special.
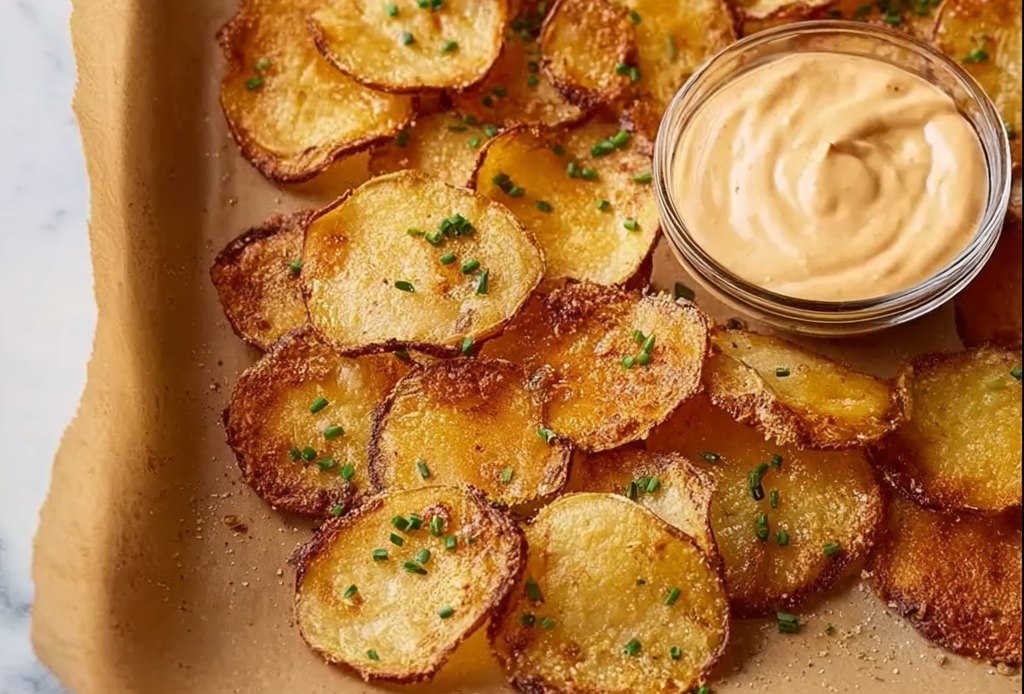
Try them with a cool dill yogurt dip. Or serve alongside a juicy burger. A sprinkle of fresh chives makes a nice garnish. For drinks, try crisp apple cider. A light lager beer also pairs well. Both cut through the saltiness perfectly. Which would you choose tonight: the cider or the lager?
Keep Your Chips Crispy
Store cooled chips in a paper bag. They stay crisp for two days. A cookie tin also works well. Avoid plastic bags, they cause sogginess. You cannot freeze these chips successfully.
They are best eaten right away. Make a big batch for parties. My grandkids finish them in one sitting. Why does this matter? You control the ingredients and salt. That is a win for your health.
What is your best tip for keeping snacks crisp? Share it with us below.
Quick Fixes for Common Problems
Are your chips soggy? They were not dry before baking. Pat slices thoroughly with a towel. Uneven cooking means slices are different thicknesses. Use a mandoline for perfect, even slices.
Burned edges happen when pans are crowded. Always use a single layer. Give each chip some breathing room. This simple step guarantees golden chips. Why does this matter? Small fixes build kitchen confidence.
Have you ever rescued a baking mistake? Tell me your story.
Your Chip Questions Answered
Are these chips gluten-free? Yes, potatoes and oil are naturally gluten-free. Just check your seasoning blends. Can I make them ahead? They lose crunch after a day. I suggest baking them just before serving. What oil can I swap? Any neutral oil works. Avocado or canola oil are great choices. How do I double the recipe? Use more baking sheets. Bake them one sheet at a time. Sweet potatoes instead? Absolutely. Just slice them the same thin way. They may need less bake time.From My Kitchen to Yours
I hope you try these simple chips. Homemade snacks taste so much better. They fill your home with a wonderful smell.
Show me your creations! Tag Savory Discovery on Pinterest.


Baked Potato Chips at Home
Description
Make crispy, delicious potato chips at home with just a few simple ingredients. A healthier baked alternative to the store-bought version.
Ingredients
Instructions
- Heat your oven to 400 degrees Fahrenheit. Wash and dry the potatoes. Slice them very thin with a knife or mandoline. Uniform slices cook evenly.
- Toss the potato slices in the oil to coat them completely. Add salt, pepper, and any extra seasoning.
- Spread the slices in a single layer on baking sheets, ensuring they are not crowded. Bake for 15-20 minutes.
- Check the chips after 15 minutes. They should be golden and crisp. Let them cool on the sheet for five minutes to become crunchier.


